Workspace
The workspace lists all of the maps you have created or maps that have been shared with you. From here, you can:
Create a new map
Search the table for any map
Sort the map list by clicking on any of the table headers
Check the processing status of a map
Open / Edit / Delete / Reprocess a map (clicking on the pencil directly opens the map in edit mode) or open a previous version of a map
Share a map
Open the map dialog by clicking on the hyperlink
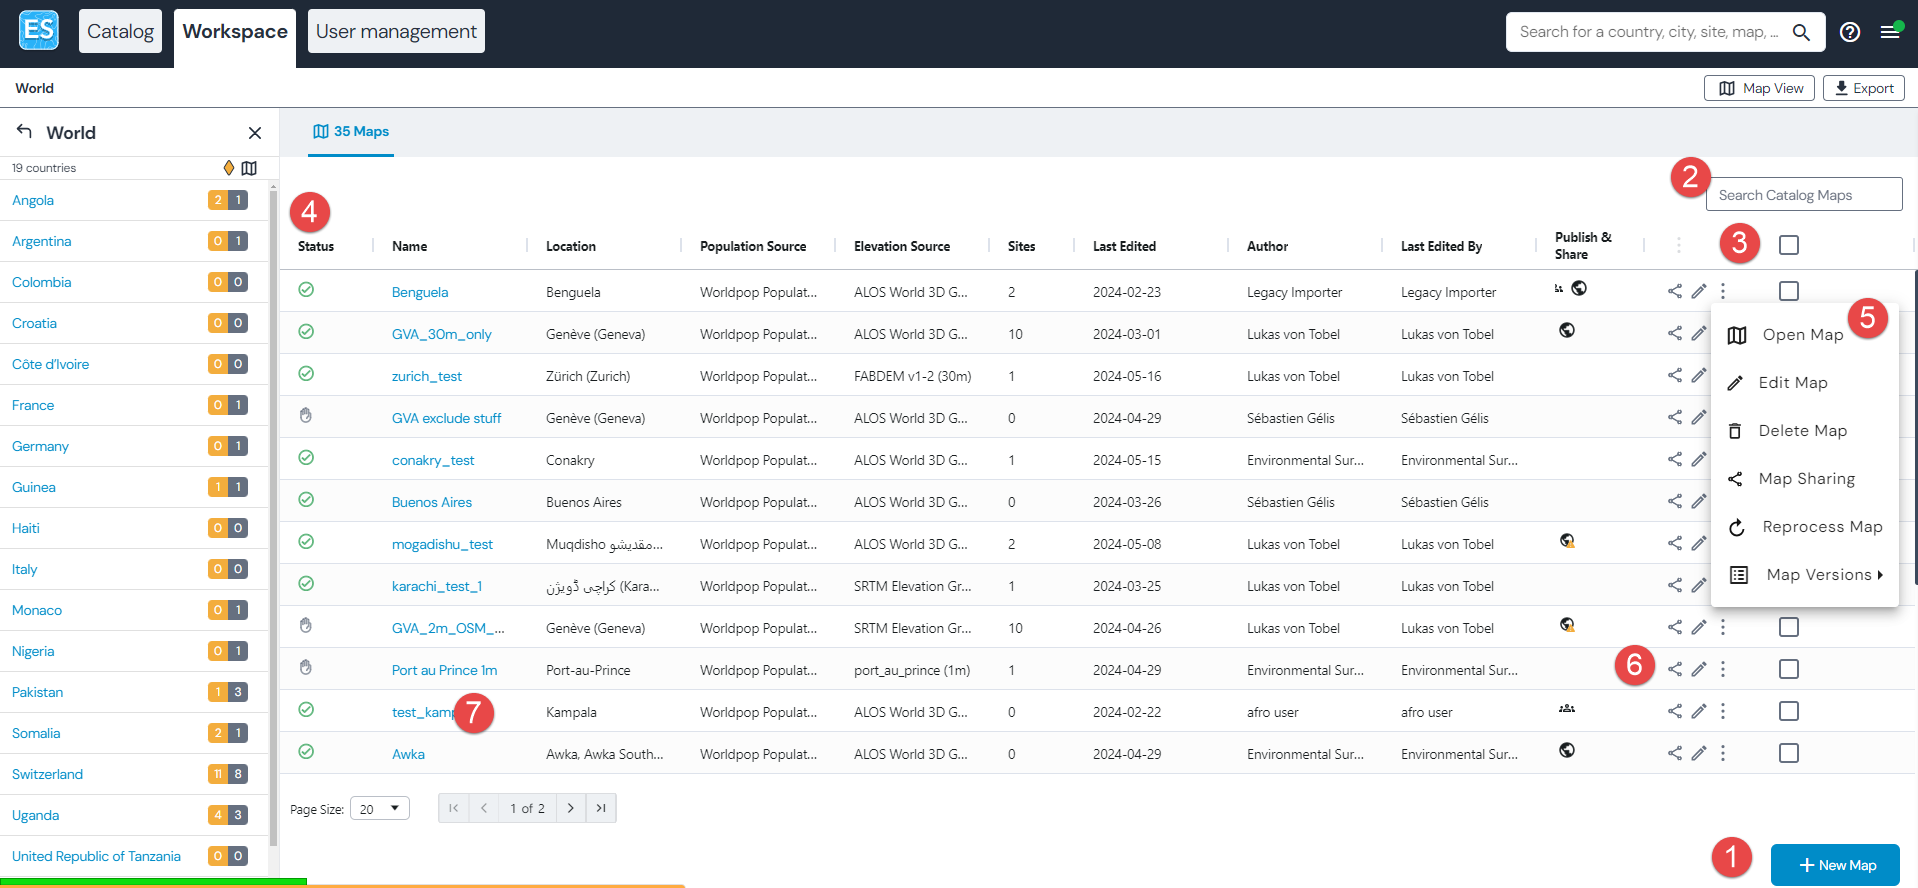
You can batch delete maps or batch reprocess maps by selecting multiple maps at once.
The processing icons indicate if maps have processed successfully, if they are awaiting processing, if processing has failed, or if processing is ongoing.
Hint
The workspace can also be viewed in a map view.
Publish or share a map
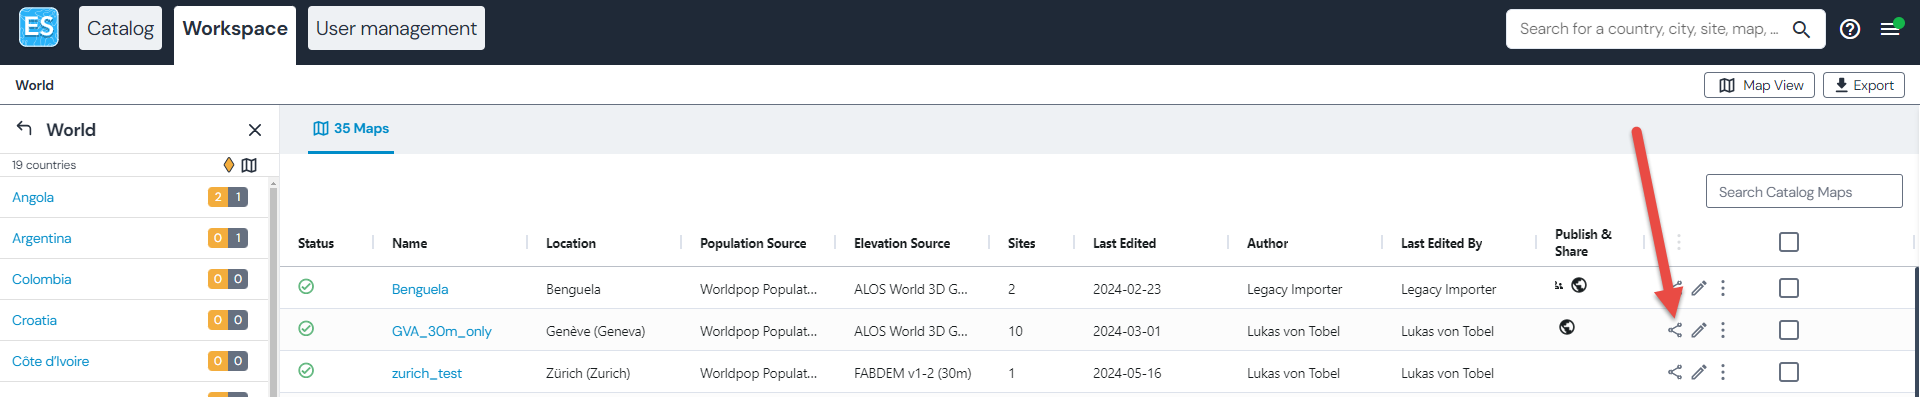
As long as a map has not been published or shared, it is only visible to the creator of the map (as well as the organization managers, see Organization manager). In order to publish a map to the catalog, click on ‘Share’.
The dialog allows to:
Publish a map to the catalog - this makes it visible to anyone
Share the map with groups or individuals - this is only possible if the person you want to share with already has an account for the application and that person is wtihin your organization
Important
The purpose of this application is to make as much information on environmental surveillance publicly available as possible. Thus, the default should always be to publish a map. In some cases, it might be required that some people collaborate on a map before it can be published - thus, sharing can be useful in those cases. However, it should remain an exception and ideally once a map has been finalized it should always be published.
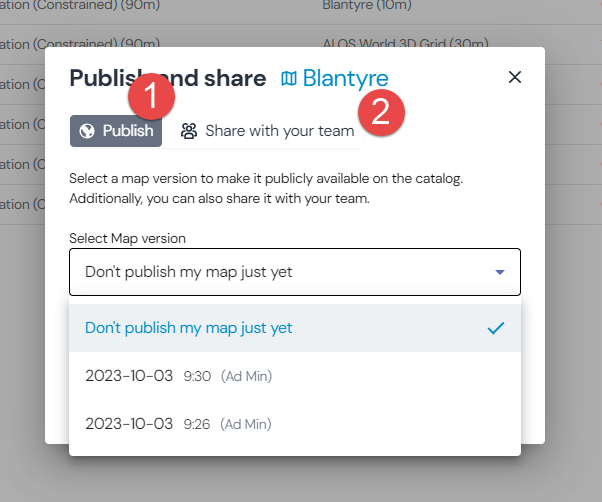
To publish, you need to select the map version that should be published.
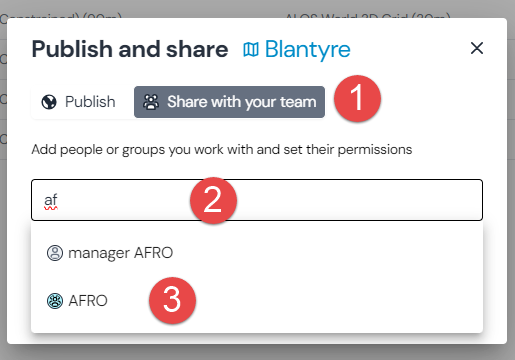
To share a map with an individual or group:
Click on ‘Share with your team’
Type the username or group name
Select the user or group you want to share with
Click the sharing permission (view only or edit)
Click ‘Save settings’
Once a map has been shared this way, it will appear in the workspace of the users it was shared with.
Exports
See Exports
Search
See Search